
How to Clean a Home After Renovation or Construction
- Melani

- Aug 4, 2025
- 3 min read
Renovating or building your dream home is exciting—but once the work is done, the dust and debris left behind can quickly become overwhelming. At Texas Cleaning Services, we specialize in post-construction and renovation cleaning, and we know exactly what it takes to bring that new space to life—clean, polished, and move-in ready.
Here’s a professional guide to cleaning a home after renovation or construction.
1. Start with Safety
Before grabbing the mop, make sure your cleaning area is safe:
Wear a mask to avoid inhaling fine dust
Use gloves to protect your hands from debris or chemicals
Open windows for ventilation—construction dust can hang in the air for days
2. Dust… Everything
Construction dust settles on every surface—yes, even inside cabinets and light fixtures.
Where to dust:
Ceilings, walls, baseboards
Light fixtures and fans
Shelves and built-ins
Door frames and window sills
Cabinet interiors and exteriors
Use microfiber cloths or dusters, and don’t forget to vacuum upholstery and soft surfaces like curtains.
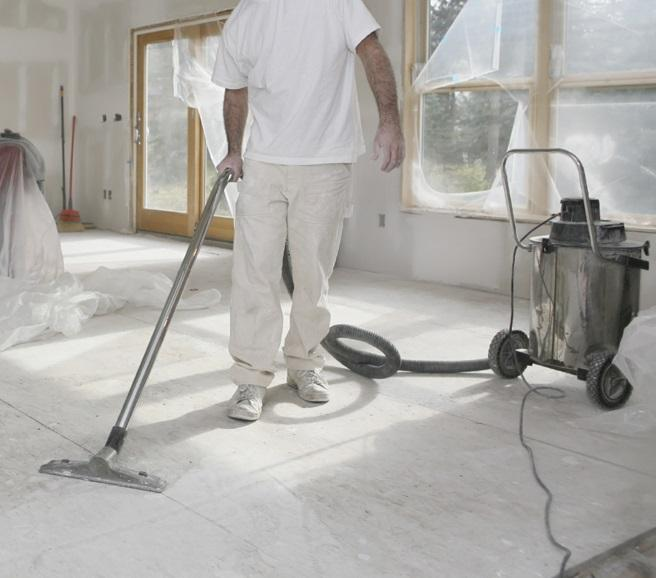
3. Vacuum and Sweep Thoroughly
Vacuum all floors—carpeted and hard surfaces—multiple times to pick up fine dust and larger debris. Use a shop vac or HEPA filter vacuum if available.
Don’t forget to vacuum:
Behind appliances
Inside closets
Under furniture
Vents and air returns
Follow with a good sweeping to collect any lingering particles.
4. Mop Hard Floors (More Than Once)
Dust clings to tile, laminate, hardwood, and vinyl floors. After vacuuming and sweeping, mop all floors thoroughly—twice if needed.
Use warm water with a gentle floor-safe cleaner. Avoid saturating wood floors—light, repeated passes are better than one heavy soak.
5. Clean Windows and Glass
Construction leaves streaks, paint splatters, and stickers on windows and mirrors.
Steps:
Scrape off paint or adhesive gently with a plastic scraper
Wash windows inside and out with glass cleaner
Polish mirrors and any glass surfaces
Clean windows let in more light—and make your fresh space shine.
6. Wipe Down All Fixtures and Hardware
Handles, knobs, switches, faucets, and outlet covers collect dust and fingerprints fast. Wipe all down with a mild disinfecting cleaner and a soft cloth.
Pay extra attention to:
Kitchen and bathroom fixtures
Light switch plates
Doorknobs
Thermostats and intercoms
7. Tackle the Air Vents and Filters
Construction dust often clogs HVAC filters and lingers in air vents. Replace or clean air filters and vacuum around vents and ducts. Consider having the system professionally cleaned if the renovation was major.
8. Polish and Protect Surfaces
Give newly installed countertops, sinks, and other surfaces a protective finish or polish to maintain their shine and prevent damage.
Granite or quartz countertops may need sealing
Stainless steel appliances benefit from a polish
Wood cabinetry might need a gentle conditioner
9. Final Touches: Remove Trash and Construction Leftovers
Bag up all remaining debris, scraps, tape, plastic coverings, and construction materials. If you’ve been working with contractors, confirm whether they’ll handle disposal or if you’ll need to schedule a pickup.
Post-Renovation Cleaning Doesn’t Have to Be a Headache
While DIY is possible, post-renovation cleaning can be labor-intensive and time-consuming. If you want spotless results without the stress, Texas Cleaning Services offers thorough, affordable, and professional post-construction cleaning tailored to your needs.
📞 Contact us today to schedule your post-renovation cleaning. We’ll bring the sparkle—so you can enjoy your space!
Looking for home cleaning services in Austin?
Local Austin Cleaning Services
TEXAS CLEANING SERVICES
@texascleaningservices is a local Austin small business specializing in a variety of services including general, deep, move in and move out, office, & custom cleaning
Review by one of our clients: “Fernando and Zoraida did an amazing job. I hired them to clean a recliner that had been in storage for over 10 years. It was so dusty and stained. When they finished, it looked as good as new!”


Comments